Picking Patterns - Lesson three
|
In this lesson we will continue using the same three chords (although you are completely free to use another three chords if you wish, as long as they have bass notes on the 4th, 5th or 6th strings).
Continuing to use the classical finger method and plectrum notation as follows (see lesson one if this is not clear. 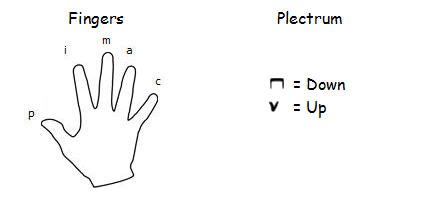
So let’s look at pattern three.
This pattern is more complicated than the previous two. As you can see the pattern jumps up and down rather than going straight up or down. Instead of playing from the lowest note to the highest, you play the lowest note, jump to the highest then skip to the 2nd lowest and then back to the second lowest. 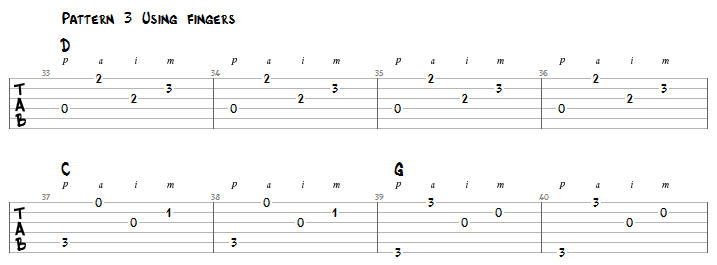
Here you can see you are playing four bars of D using your thumb (p) to pluck the 4th string, followed by your ring finger (a) playing the 1st string, index finger (i) plays the 3rd string and finally the middle finger (m) playing the 2nd string.
Again we are using one pluck per beat, with bars 5 and 6 are using a C chord with the pattern only changing for the thumb which now plucks the 5th string rather than the 4th, and again two bars of G where the thumb now plucks the 6th string. Next we will play the same pattern using a plectrum. 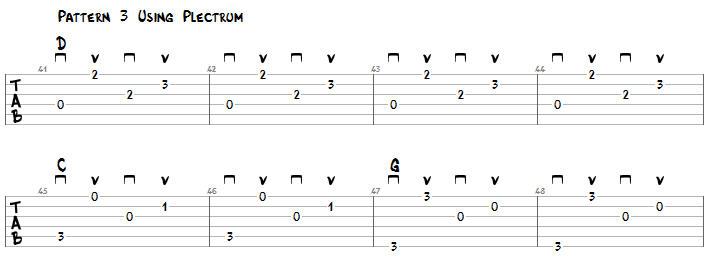
The chord progression is exactly the same. The main difference over lessons one and two is that there is you have to alternate the up and down strokes. This is an important technique to master as it will help you greatly with playing scales smoothly. Take your time with this one as it will take some time to master and you need to be able to play this one before you can go on to pattern four.
|
