Strumming Patterns - Lesson one
|
For a Rhythm guitarist strumming is a key skill that you absolutely must become comfortable with. Also an understanding of the rhythm structure shows in these exercises will also help with your lead playing when you get to that (if you haven't already).
So what is a strum? Basically it's a quick stroke across the strings with your plectrum. You don't need to bash your guitar hard to do this (although you can if you want to). It's a combined wrist and elbow motion depending on how hard or fast you need your strumming to be. Check out the video below to see what I mean. Here are five progressively harder strumming patterns for you to get to grips with. All of these are in 4/4 time, i.e. you count from one to four for each bar (section between the vertical lines). For these first few exercises we will be using only strums that fall on the actual beat. By this I mean that if you count from one to four the strums will happen when you count one, two, three or four. Each beat (one, two, three and four) should have an even gap between them. Like the ticking of a clock (which is also a good speed to start these exercises). Make sure you can do this with a solid rhythm, on the beat. I would suggest you get a metronome if you haven’t already got one and start at 60bpm (one beat per second) and make sure you can consistently do one exercise before you move on to the next one. So what do the note values look like and what do they mean? 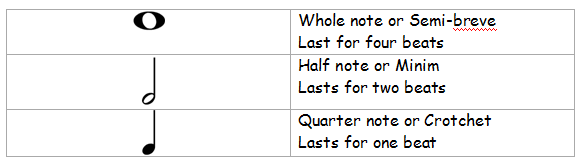
The only other thing you need to know at this point is whether to strum down (towards the floor) or up (towards the ceiling). This is shown on the music by these symbols.

It is important you follow these markings to ensure your playing is as fluid as possible.
For all of these exercises I’ve chosen to use two chords Em and Am. But really, as the purpose of these exercises is to get you strumming it doesn’t really matter which chords you use as long as you can change between them quickly and smoothly. So let’s look at Exercise One. This exercise uses all whole notes. This means that you strum down towards the floor when you count ‘one’ and let the chord ring while you count ‘two, three, four’ and then strum again when you get back to one. Always make sure you count at least a whole bar (i.e. one, two, three, four) to yourself before you start to play. This will establish the beat in your head and make your playing more rhythmically consistent. 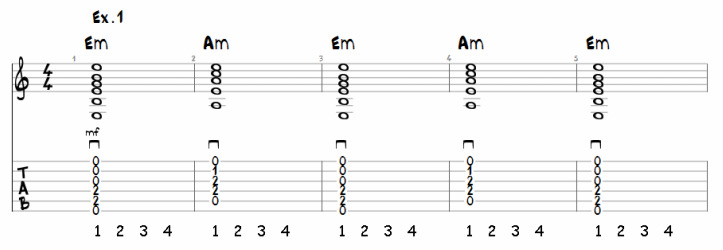
Important:- if you cannot play this rhythm in time while you are changing chords then stay on the same chord until you can consistently play the rhythm, then start changing chord.
Ok on to Exercise Two This exercise uses only half notes. Remember, each half note lasts ‘two’ beats, so for this the strums appear on beats ‘one’ and ‘three’. 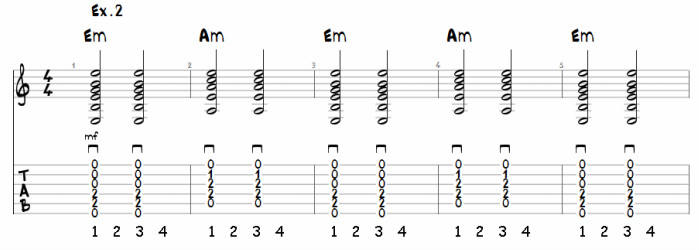
Again, the important thing here is to be consistent with the rhythm.
As before, make sure you can play this rhythm consistently before moving on to the next exercise. Important:- Your strumming will sound much better and more flowing if you relax as much as you can. Try not to play with your arms, shoulders and hands tense. On to Exercise Three For this exercise we’re now playing one strum on every beat. 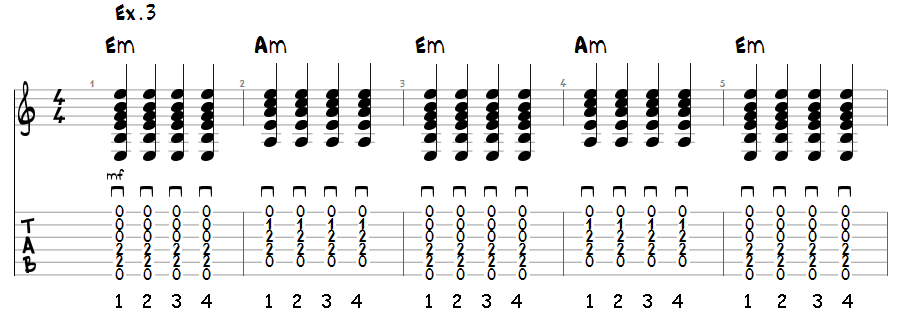
At this point you may find that the chord isn’t ringing out clearly, take some time here to make sure that there are no duff notes and that the chord isn’t being ‘choked’ off on each strum. It should be a clear ring through to the next strum.
This is also where you're most likely to slow down or speed up. Make sure you keep a steady and consistent rhythm. If you're still struggling to do this then use a metronome and start at around 60 to 70 beats a minute and only speed up when you can play it consistently at that speed. Now for Exercise Four From now on we'll be mixing and matching note values. In this exercise you start with a half note (remember this lasts two beats) and then quarter notes on beats three and four. So play on beat one, let it ring through beat two and then play on beats three and four. 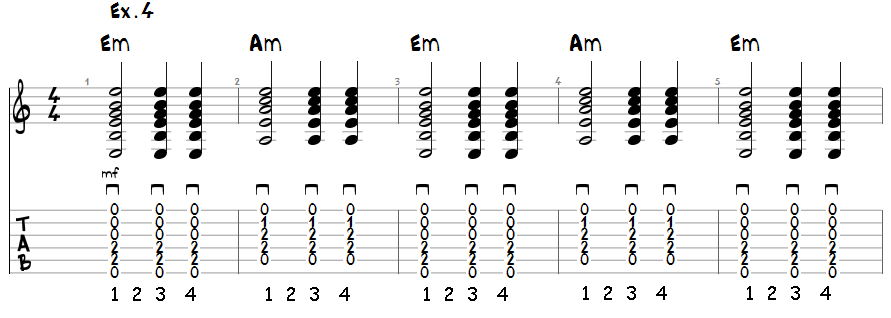
By this time you should be getting better and keeping time and your strumming should be sounding more relaxed.
Last one in this section Exercise Five You could consider this a reversal of exercise four. Here we are playing two quarter notes on beats one and two, followed by a half note on beat three that rings through beat four. 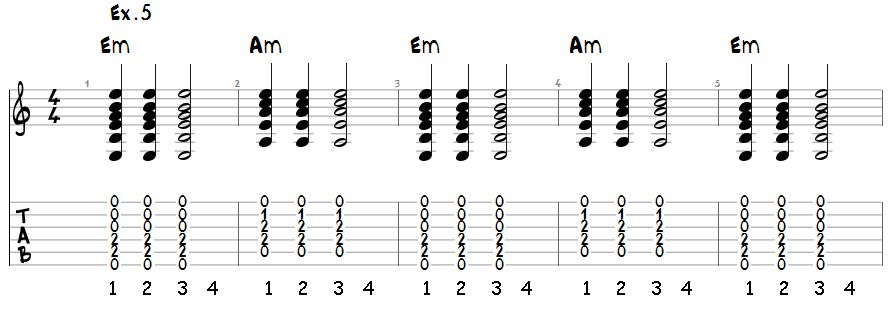
Ok that’s the first five patterns. Remember, stay relaxed and it will flow much smoother, only worry about changing chord when you can clearly play the pattern with one chord.
Tips for improving. Once you can play them all consistently at a speed of 60bpm, try 70, then 80 etc. go to 5’s if you need to (i.e. 75, 85). See how fast you can manage, it’s always better to be able to play faster than you actually need to, then your playing will be fluent and confident. Also, if you feel confident, try mixing and matching the patterns yourself, one or two bars from each pattern using other chords. See what you come up with. Just ensure that there is always a consistent beat. |
